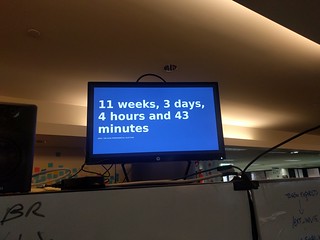
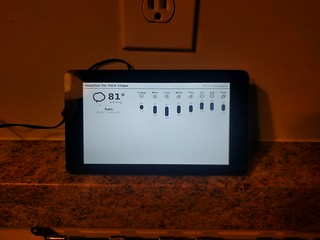
I love having things on my walls. I love screens just showing random stuff. I've recently discovered how easy it is to make an inactive screen that just displays content.


First thing you need is the hardware:
- Raspberry Pi (any version will work, but an rPi 3 comes with wifi onboard)
- Network cable for setup
- WiFi dongle if you buy an rPi 1 or 2
- Power cable
- An HDMI screen
- An HDMI cable
- An SD card (you'll need a different size depending on the rPi you get)
My current go to for this project is the CanaKit Raspberry Pi 3 32GB Kit. It's got everything except the screen.
For a screen, I usually just search amazon for the cheapest monitor that has HDMI. You can also buy the really nice 7" rPi touchscreen. I've only built one, but it was really easy and doesn't require extra power, which is nice.
You can install either raspbian or raspbian lite. Both work well. The raspbian image is larger, but has all the graphics and whatnot already set up. Raspbian Lite works incredibly well, but I've never been able how to figure out to get it to play movies right.
I usually go straight to the download page and grab the image I want: https://www.raspberrypi.org/downloads/raspbian/
Then I go to raspberrypi.org's installing images page and follow the instructions.
At the end, you have an SD card with an entire operating system on it.
Next, plug the raspberry pi into things:
- Put the SD card in the Pi
- Put the networking cable into the Pi (and the other end into your router)
- Put the power cable into your Pi
Watch lights flash! It's booting!
Then figure out the IP of your Pi. Usually your home router will tell you, but you can also run
$ nmap 192.168.1.*
to scan for computers with open ports on your network. Your network may have a different IP address scheme, so that IP should be whatever your IP is, with the last digit replaced with an asterix. Look for a box that only has port 22 open.
Once you have the IP, ssh to box.
$ ssh pi@192.168.1.36 # or whatever IP you found
Now you're connected to your box! Huzzah!
First things first, I usually run upgrades and install some essentials.
$ sudo aptitude update && sudo aptitude -y upgrade && sudo aptitude -y install build-essential git vim
Go get a coffee, this will take a while.
While you're waiting, or when it's done, you can ssh into the box in another terminal and setup wifi. https://www.raspberrypi.org/documentation/configuration/wireless/wireless-cli.md is a great tutorial for setting it all up. Just don't restart your Pi before the upgrades are done!
Next we're going to create a script that will run to keep a nice webpage on our screen.
I usually call this display.sh:
#! /bin/bash

xset -dpms # disable DPMS (Energy Star) features.
xset s off # disable screen saver
xset s noblank # don't blank the video device

unclutter & # Always hide the mouse
matchbox-window-manager & # Our window manager

# Launch a webbrowser fullscreen with a url
# and reload if there is inactivity for 900 seconds
midori -i 900 -e Fullscreen -a https://icco.github.io/home-dashboard/
Now make it so anyone can run that script:
$ chmod a+x display.sh
Next let's install everything we need:
sudo aptitude -y install x11-xserver-utils midori unclutter matchbox lightdm
Now let's install the two configs to make it so display.sh is run on boot. LightDM is the display manager and it starts up the login screen, and automatically logs into a user. If you want, you can create a new user to do this. I won't cover this in this tutorial, but I usually delete the user pi, and create two users, one called nat that has sudo and a strong password, and one called mirror, which can't do much, but runs the login script.
First script we need tells lightdm we want to autologin and launch our desktop file (which we create next).
/etc/lightdm/lightdm.conf.d/50-autologin.conf:
[SeatDefaults]
user-session=midori
autologin-user=pi
Next file is the midori.desktop file, which defines the xsession that will run when pi logs in.
/usr/share/xsessions/midori.desktop:
[Desktop Entry]
Encoding=UTF-8
Name=Midori
Comment=This session launches a fullscreen midori
Exec=/home/pi/display.sh
Terminal=False
Type=Application
Run sudo shutdown, unplug the network cable if you configured wifi, plug in the monitor, replug in the power to your pi, and it should reboot, and in a minute, it should startup with your web page on it!
Ta da! I hope you enjoyed this tutorial. Tweet or email me if you find some bugs in it!
/Nat
p.s. Don't forget to setup backups if you want them. I usually use tarsnap.